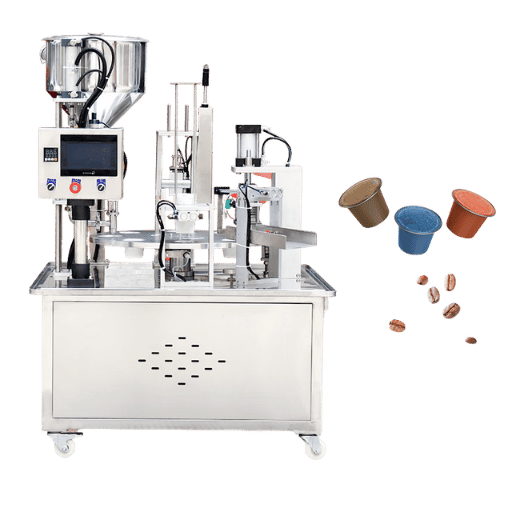
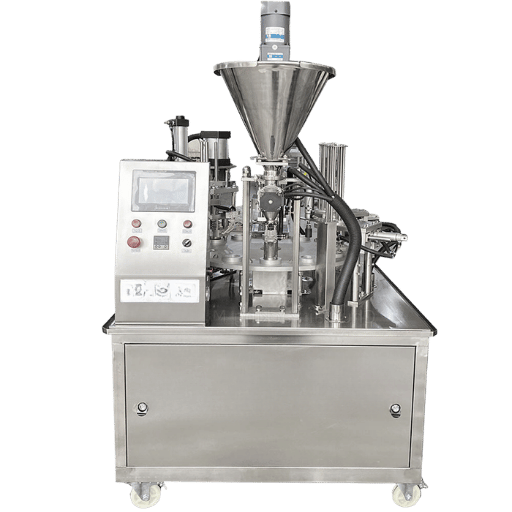
Kalibrasi dosis k cup yang tepat membuat perbedaan antara lini produksi yang secara andal menghasilkan 10,5g kopi per kapsul, dan lini yang tidak diperhatikan, kehilangan uang, mempertaruhkan pelanggaran kepatuhan, dan menurunkan kualitas cup tanpa ada yang menyadarinya. Untuk mesin pengisi AFPAK, kalibrasi adalah dua variabel kontrol terhadap realitas fisik kopi Anda, lingkungan Anda, dan mekanisme auger Anda: Isi Berat, dan Isi Rasio. Panduan ini memandu Anda melalui seluruh proses: bagaimana sistem dosis auger bekerja, apa yang memaksa Anda untuk mengkalibrasi ulang, prosedur langkah demi langkah, verifikasi QC, mendiagnosis tujuh kesalahan paling umum, dan peraturan berat bersih FDA.
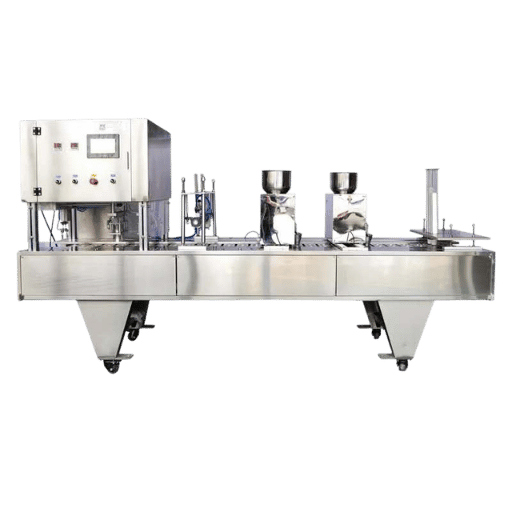
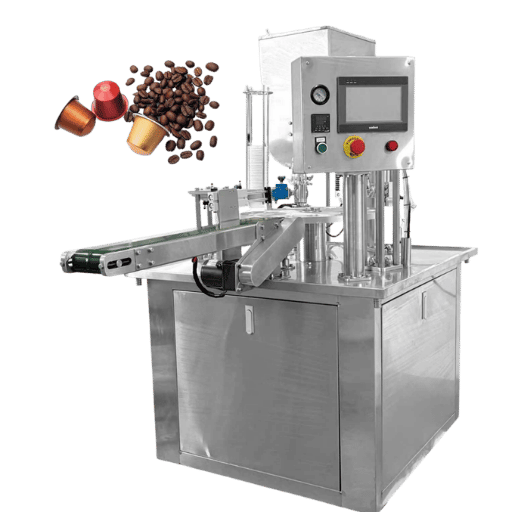
Spesifikasi Referensi Cepat Mesin AFPAK
| Berat isi K-cup standar | 10 ج12 g kopi bubuk |
| akurasi kalibrasi auger AFPAK | ±0.2 g |
| Kenaikan penyesuaian Rasio Isi | ±0.01̓.02 per percobaan |
| Ambang batas penerimaan kalibrasi | ≤ 0,1 g penyimpangan dari target |
| Tingkat pengisian hopper selama kalibrasi | Kapasitas 60 ¡ |
| Isi pemanasan untuk dibuang | 5 pengisian pertama per kalibrasi dijalankan |
| Suhu penyegelan (referensi) | 120͕150°C di 0.3͕0.5 MPa |
Apa Itu Kalibrasi Dosis K-Cup — dan Bagaimana Cara Kerja Sistem Auger?

Kalibrasi tidak sama dengan menetapkan target berat pada layar sentuh. Ketika Anda memasukkan nilai ke dalam Isi Berat bidang pada Anda Mesin pengisian K-cup, Anda memberi tahu mesin apa yang Anda inginkan. Parameter Isi Berat dan Isi Rasio bersama-sama menentukan apa yang sebenarnya diberikan mesin — dan kedua hal itu jarang identik pada pengaturan pertama.
Auger dosing: sekrup heliks penyaluran berjalan melalui pusat hopper bubuk, diisi dengan kopi bubuk. Didorong oleh motor servo melalui nμmber rotasi yang ditentukan, setiap putaran auger menggerakkan volμme tetap dari tanah, melalui nosel dosis dan ke dalam kapsul di bawah ini. Tetapi volume terkait dengan massa melalui kepadatan جتحميناء اللميناء المينا اللاله اللله الله اللله فاهو اللله اللله اللللله اللللله الللاله اللللاله الللالاله الللالالاله فاللللالاهو اللالهو فاللهو فالهو الللالهو الللللللهو الللللللللله.
Catatan Teknik
Isi Berat = target gram yang Anda masukkan pada panel kontrol. Rasio Isi = koefisien yang menerjemahkan target itu ke dalam jumlah tertentu dari putaran auger. Motor servo mengeksekusi putaran tersebut dengan presisi sub-putaran, tetapi Rasio Pengisian harus ditetapkan secara empiris untuk setiap jenis kopi untuk memperhitungkan perbedaan kepadatan. “Dikalibrasi” berarti: berat pengisian rata-rata terukur = target ± 0,1 g selama lima atau lebih sampel berturut-turut.
Pendekatan kalibrasi dua nilai ini memberi operator target yang ditetapkan (Berat Isi) dan “konstanta mekanis” (Rasio Isi) Σ yang tidak memiliki nilai yang telah ditetapkan dan merupakan aspek yang akan Anda sesuaikan jika mesin tidak sesuai target. Setelah mengisi batch daging panggang Light Ethiopian dengan hasil yang ideal, operator kemudian perlu menurunkan Rasio Isi setelah mereka beralih ke campuran panggang Dark French yang lebih padat.
Mengapa ± 0.1g Matters — Biaya Bisnis Dosing Drift

Sebuah penyimpangan 0,1 gram terdengar diabaikan. Pada skala produksi, tidak. Perhitungan berikut — apa yang kita sebut Aturan ±0.1g — menunjukkan mengapa akurasi dosis terutama disiplin keuangan, bukan hanya mekanik:
The ± 0.1g Aturan — Dosing Drift pada Skala
At 10.000 cangkir/hari produksi pada satu jalur pengisian:
- Overfill oleh 0,5 g/cup = 5.000 g (5 kg) kopi terbuang per hari = 17,28# kopi hilang setiap hari = 6,321# kerugian tahunan per mesin
- Pada harga $15/kg ($6.80#) pada kopi khusus, ini setara dengan $75/hari yang terbuang dalam satu mesin = $27.375/tahun yang mendekam dalam limbah yang tidak dapat dipulihkan
- Pengisian kurang sebesar 0,3 g=produk di bawah standar + risiko pelanggaran berat bersih peraturan
Kedua arah membawa biaya nyata. Inilah sebabnya mengapa ± 0,1 g adalah target kalibrasi industri — bukan ± 0,2 g plafon akurasi mekanis.
Di sisi kepatuhan, standar FDA 21 CFR 101.9 mengamanatkan deklarasi berat bersih keseluruhan produk makanan kemasan menjadi akurat. Praktik terbaik saat ini untuk variasi (MAV) maksimum yang diijinkan dari paket dengan berat 50g, menggunakan NIST Handbook 133 (2023), adalah 9% ¡tut – · · · · · · · · · · · · · · · · · · · · · · · · · · · · · · · 4,50 g jika target berat rata-rata adalah 50 g. Jadi sementara pada pandangan pertama pita MAV ini tampaknya memberikan kelonggaran yang sangat besar dalam berat kapsul individu, legislator mengatur rata-rata lot, bukan unit individu. Rata-rata mesin yang menghasilkan 0,5 g cahaya pada 100k/cangkir tidak akan lulus pemeriksaan lot.
Ada faktor rasa juga. Asosiasi Kopi Khusus mengadvokasi rasio tanah terhadap air panas 1:16-1:18 untuk hasil ekstraksi maksimum. Variasi berat isi 0,5g secara signifikan mengubah ekstraksi, menghasilkan cangkir yang akan atau tidak akan terasa mirip dengan produk yang Anda sepakati. Mesin yang dikalibrasi dengan buruk dapat menghasilkan produk yang kemungkinan besar berbeda rasanya dari target merek Anda, batch ke batch.
Intinya: selalu kalibrasi ke 0,1 g untuk mempertahankan 0,2 g buffer akurasi produksi Anda, memastikan kepatuhan, dan menjaga konsistensi cangkir Anda.
5 Variabel yang Memaksa Anda untuk Melakukan Kalibrasi Ulang (Bahkan Setelah Pengaturan Sempurna)
Kalibrasi yang benar kemarin bisa tidak seimbang hari ini. Lima faktor berbeda bertanggung jawab atas lebih dari 80% toleransi berat isi untuk produksi K-cup جم فاه ميناء ميناء ميناء ميناء ميناء ميناء ميناء ميناء ميناء ميناء ميناء ميناء ميناء ميناء ميناء ميناء ميناء مينالالالالالالالالالالالالالالالالالالالالالالالالالالالالالالالالالالالعربية مينو مينالالالالالالالالالالالالعربية مينولالالالالالالالالعربي مينولالالالال
Apakah ukuran grind mempengaruhi kalibrasi mesin pengisian K-cup?
Ya جlebih dari sekadar apa pun, dan efeknya tidak proporsional. Studi sistem pengisian auger menunjukkan pola ambang batas: brews kasar sedang dalam kisaran ukuran partikel 200-1.000 m menghasilkan akurasi volumetrik 99,0-99,5%. Di bawah sekitar 100 m (penggilingan espresso, halus), akurasi dosis jatuh jauh ke 97,5% (drop-in yang diucapkan yang non-linear dengan ukuran butir. Penggilingan halus cenderung macet secara istimewa di bawah kompresi auger, menghasilkan jembatan mikro yang menghasilkan output volumetrik yang tidak seragam. Bottom line: jika Anda mencampur gilingan halus untuk K-cup, Anda perlu mengkalibrasi lebih sering.
| Variabel | Efek pada Berat Isi | Tindakan Kalibrasi |
|---|---|---|
| Menggiling ukuran partikel | Penggilingan halus (<100 μm) mengurangi akurasi menjadi 97,5%; medium-kasar mempertahankan 99,0 Ƒ9,5% | Kalibrasi ulang penuh pada setiap perubahan penggilingan |
| Tingkat panggang / kepadatan | Panggang ringan lebih padat daripada panggang gelap; auger yang sama berputar → pengisian lebih berat per rotasi | Kalibrasi ulang penuh saat mengganti profil panggang |
| Kelembaban / kelembaban | Kelembaban tinggi menyebabkan penggumpalan bubuk → aliran auger yang tidak menentu dan ayunan berat | Verifikasi kalibrasi saat RH bergeser >15% |
| Tingkat pengisian hopper | 80%: kompres bubuk, overshoots | Pertahankan 60 Ƒ 80% selama kalibrasi dan produksi |
| Suhu lingkungan | Lingkungan dingin sedikit meningkatkan kepadatan kopi; periode pemanasan penting | Pemanasan 10 menit sebelum kalibrasi dalam kondisi dingin |
Pro Tip
Simpan a log kepadatan kopi. Setiap kali Anda mengambil pengiriman batch baru — bahkan asal yang sama, panggang yang sama — berat 100 ml kopi bubuk dalam wadah lulus dan merekamnya. Jika kepadatan volumetrik telah bergeser lebih dari 5%, menjalankan kalibrasi segar sebelum memulai produksi.
Kalibrasi Dosis K-Cup — Prosedur Langkah-demi-Langkah

Prosedur berikut didasarkan pada dokumentasi mesin pengisian AFPAK dan mencakup urutan kalibrasi penuh — dari pra-pemeriksaan melalui penguncian pada Rasio Pengisian akhir. Sebelum Anda mulai, baca mengatur parameter pengisian panduan untuk model mesin spesifik Anda jika Anda belum melakukannya.
- Persiapan pra-kalibrasi. Nyalakan mesin dan sambungkan pasokan udara. Kemas hopper ke kapasitas 60-80% dengan kopi yang ingin Anda jalankan. Jangan mengkalibrasi dengan hopper kosong atau terisi berlebih ķ baik kondisi normal menghasilkan Rasio Isi yang tidak akan diterjemahkan hingga akhir proses.
- Siapkan stasiun penimbangan. Lepaskan hopper sehingga stasiun pengisian tidak terhalang. Tempatkan bejana atau baki pengumpul yang bersih di bawah unit pengeluaran. Nol keluar skala presisi yang terbukti (minimum resolusi 1 g, lebih disukai 0,01).
- Masukan target Berat Isi Anda. Tekan panel kontrol dan pukulan dalam jumlah gram ج untuk tes 10,5 g. Ingat: ini adalah tujuan default mesin Anda; Rasio Isi adalah ukuran penyimpangan Anda dari tujuan itu.
- Mulailah dengan Rasio Isi pabrik stok. Saat membuat batch baru dari jenis minuman yang berbeda, lepaskan nilai default. Untuk keperluan QC, mulailah dari nilai sebelumnya dan lakukan sedikit penyesuaian.
- Jalankan dalam mode manual + isi + aduk. Buang 5 pengisian pertama. Distribusi bubuk Auger perlu stabil setelah startup — pengisian awal tersebut tidak mewakili output produksi.
- Kumpulkan dan timbang lima pengisian berurutan. Gunakan skala terkalibrasi Anda sendiri! rata-rata dan catat semua lima bobot Isi tunggal.
- Jumlahkan kelima dan bagi dengan (5) untuk menentukan keluaran Anda saat ini berdasarkan Rasio Pengisian saat ini.
- Sesuaikan Rasio Pengisian berdasarkan deviasi.
- Rata-rata atas target: kurangi Rasio Pengisian sebesar 0.01–0.02
- Rata-rata below target: tingkatkan Rasio Pengisian sebesar 0.01–0.02
- Deviasi 0,1 g: sesuaikan dengan 0,02.
- Ulangi langkah 5-8 hingga penyimpangan 0,1 g. Biasanya membutuhkan 2-4 siklus penyesuaian. Ketika penyimpangan tidak menunjukkan tanda mendekati nilai yang ditargetkan setelah 6 siklus, selidiki masalah mekanis (lihat bab Pemecahan Masalah di bawah).
- Atur hopper ke posisi asli yang tepat. Setelah kalibrasi selesai, kembalikan hopper ke posisi horizontal dan vertikal yang tepat asli. Setelah kalibrasi, setiap perubahan posisi menghasilkan efek tepi yang dapat mengubah nilai Rasio Pengisian.
- Dokumen dan kunci di Rasio Isi. Isi log kalibrasi, mencatat Rasio Isi akhir, jenis kopi (asal, panggang, pengaturan grind), tanggal dan nama operator. Periksa Anda Perawatan mesin pengisian K-cup log — periksa perubahan mekanis apa pun yang dilakukan sejak kalibrasi terakhir Anda dijalankan.
Catatan Teknik — Hierarki Akurasi
Sistem auger AFPAK mencapai akurasi mekanis 0,2 g saat beroperasi dalam kondisi stabil. Mengkalibrasi hanya dengan akurasi 0,1 g memberikan buffer 0,2 g yang menyerap variasi normal yang melekat pada produksi massal tanpa menembus ambang akurasi 0,2 g. Tetapkan 0,1 g sebagai akurasi kalibrasi target; tetapkan 0,2 g sebagai batas toleransi produksi Anda.
Cara Verifikasi Kalibrasi Dipertahankan Selama Produksi (QC Sampling Protocol)
Kalibrasi saja tidak memastikan akurasi berat isi sepanjang lari. Tingkat hopper habis, suhu dipercepat, dan karakteristik bubuk berubah seiring waktu. Protokol pengambilan sampel QC yang disiplin menyelamatkan Anda dari berakhir dengan batch penuh di luar spesifikasi.
Berapa banyak K-cup yang harus saya periksa untuk menjamin sistem pemberian dosis akurat?
Untuk jalur pengisian kapsul, praktik industri adalah mengambil sampel 20 cangkir per batch pada awal produksi. Jika 2 – 6 dari mereka menyimpang lebih dari 10% dari berat pengisian target, ambil sampel 40 unit tambahan sebelum memutuskan apakah akan mengkalibrasi ulang. Pada jalur berkecepatan tinggi, checkweigher inline dengan presisi ±1 mg menghilangkan pengambilan sampel manual sepenuhnya dengan memeriksa setiap kapsul saat terisi.
Protokol QC Manual (Garis Tanpa Checkweigher Inline)
- Mulai dijalankan: Timbang 5 K-cangkir dalam satu seri; periksa bobot berada dalam 0,1 g dari target
- Setiap 30 menit: Timbang 5 K-cangkir dalam satu seri; kalibrasi ulang jika 2 bobot berturut-turut menyimpang > 0,2 g
- Pergantian hopper: Timbang 3 K-cup setelah mengganti hopper; perubahan hopper adalah penyebab paling umum penyimpangan berat badan
- Akhir batch: Siapkan 10 salinan K-cup dari batch akhir untuk pencatatan dan ketertelusuran
Operator yang menjalankan a mesin K-cup putar pada throughput tinggi harus serius mempertimbangkan apakah investasi dalam integrasi checkweigher inline bermanfaat. Pada resolusi ± 1 mg dengan umpan balik waktu nyata, checkweigher modern memungkinkan garis Anda mempertahankan kontrol berat statistik tanpa menarik operator dari lantai untuk pengambilan sampel manual.
Panduan Pemecahan Masalah — 7 Kesalahan Dosis K-Cup Paling Umum
Ketika bobot produksi keluar dari spesifikasi, cara tercepat untuk memperbaikinya adalah dengan mengidentifikasi pola gejala dan mengembangkan hipotesis untuk penyebabnya. Gunakan pohon keputusan berikut: jika variasi berat badan Anda dapat diprediksi (tinggi atau rendah tetapi konsisten), modifikasi Rasio Pengisian. Jika variasi Anda acak, pecahkan masalah secara mekanis dan lingkungan sebelum menyesuaikan Rasio Pengisian.
Keputusan Cepat: Masalah Seperti Apa Ini?
- Konsisten tinggi/rendah, stabil: Sesuaikan Rasio Isi saja (0,02)
- Variasi run-to-run yang tidak konsisten: Diperlukan kalibrasi ulang penuh
- Tidak menentu, ayunan melebihi1 g: Auto-correct high/low offset error via mechanical inspection first جمالم فاهل ميناء ميناء ميناء ميناء ميناء ميناء ميناء ميناء مينالالالاناء ميناء ميناء مينالعربي فاهو فالاهو فال
| # | Gejala | Akar Penyebab | Fix |
|---|---|---|---|
| 1 | Pengisian yang kurang konsisten di semua cangkir | Rasio Isi diatur terlalu rendah untuk kopi saat ini | Tingkatkan Rasio Pengisian sebesar 0,02; ulangi pemeriksaan kalibrasi |
| 2 | Pengisian berlebihan yang konsisten di semua cangkir | Rasio Isi diatur terlalu tinggi untuk kopi saat ini | Kurangi Rasio Pengisian sebesar 0,02; periksa kembali |
| 3 | Isi beban yang melayang turun secara progresif di tengah lari | Tingkat hopper turun di bawah 60% — mengurangi tekanan kepala kelaparan auger | Isi ulang hopper ke 60 ¡80%; jalankan 5 cangkir verifikasi sebelum melanjutkan |
| 4 | Ayunan berat tidak menentu (± 0,5 – 1,0 g), tidak ada pola | Bubuk menjembatani di hopper — kopi melengkung di outlet hopper membatasi aliran sebentar-sebentar | Aktifkan fungsi pengaduk; periksa tingkat kelembaban di tempat penyimpanan; kurangi sedikit tingkat pengisian hopper |
| 5 | Penyimpangan besar tiba-tiba setelah istirahat lari atau penggantian kantong kopi | Batch kopi baru dimuat tanpa mengkalibrasi ulang — perbedaan kepadatan dari batch sebelumnya | Hentikan produksi; jalankan prosedur kalibrasi ulang penuh untuk kopi baru |
| 6 | Variasi berat meningkat setelah 15 Σ20 menit berlari | Ekspansi termal auger selama periode pemanasan mengubah jarak bebas | Selalu biarkan pemanasan 10 menit sebelum kalibrasi; kalibrasi dengan mesin pada suhu pengoperasian |
| 7 | Kopi menggumpal di nosel; mengisi berat tiba-tiba turun mendekati nol | Kelembaban relatif >65% di lingkungan produksi — kelembaban menyebabkan bubuk kopi untuk kue | Hapus penyumbatan; tambahkan dehumidifier di area produksi; simpan kopi dalam wadah tertutup <60% RH |
Jika tidak ada pola ini yang cocok dengan gejala Anda, auger itu sendiri mungkin perlu diperiksa. Tinjau faktor kunci untuk memilih mesin pengisian K-cup jika Anda mengevaluasi apakah peralatan Anda saat ini cocok untuk volume produksi dan profil kopi Anda.
Kapan Mengkalibrasi Ulang — Pemicu Wajib dan Jadwal yang Direkomendasikan
Praktik industri pada pengisian K-cup membuat satu hal yang jelas: kalibrasi ulang harus didorong oleh peristiwa, bukan didorong oleh kalender. Sebagian besar kegagalan kritis — penyimpangan berat yang besar dan tiba-tiba — terjadi di antara pemeriksaan terjadwal ketika suatu peristiwa membatalkan Rasio Pengisian saat ini. Siklus mingguan yang tetap tidak akan menangkap satupun dari mereka.
Pemicu Kalibrasi Ulang Wajib
- Beralih kopi (panggang, asal, atau menggiling)
- Kesenjangan produksi > 7 hari
- Pergeseran kelembaban relatif > 15%
- Perawatan mesin atau penggantian auger
- Kegagalan QC: ≥ 2 sampel di luar spesifikasi dalam satu batch
Jadwal Verifikasi yang Direkomendasikan
- Mingguan: Verifikasi 5 cangkir pada awal produksi
- Bulanan: Prosedur kalibrasi penuh dengan dokumentasi
- Triwulanan: Tinjau log kalibrasi untuk analisis tren drift
Apakah Anda menjalankan a linear vs rotary K-cup mengisi mesin, logika pemicunya sama: mengubah jenis kopi adalah satu-satunya peristiwa berisiko tertinggi Anda. Bangun aturan itu ke dalam SOP Anda terlebih dahulu, dan jadwalkan prosedur bulanan penuh sebagai persyaratan pemeliharaan dasar Anda.
Kepatuhan Berat Bersih FDA — Apa Arti Kalibrasi Dosis untuk Pelabelan Kopi
Kemasan kopi oleh produsen K-cup membawa aturan kuantitas konten bersih FDA yang sama untuk ditanggung. Mengidentifikasi dengan tepat apa yang diminta oleh peraturan tersebut—dan bagaimana target kalibrasi Anda selaras dengan itu—menghindari dua kesalahan: percaya toleransi yang lebih ketat diamanatkan oleh peraturan, atau percaya Anda mematuhi karena sampel kapsul melewati pemeriksaan dengan sempit.
Apakah FDA mengatur akurasi berat isi untuk K-cups?
Ringkasan Kerangka Peraturan
- FDA 21 CFR 101.9: Berat bersih makanan kemasan harus dinyatakan pada label dalam satuan metrik (g) dan adat (oz). Pernyataan yang salah adalah pelanggaran pelabelan.
- NIST Handbook 133 (2023) MAV: Untuk paket ≤ 50 g, Variasi Maksimum yang Diijinkan per unit adalah 9%. Untuk 10 g K-cup, itu sama dengan MAV per kapsul dari 0.9 g.
- Penegakan rata-rata lot: Tes yang sesuai untuk peraturan adalah lot-rata, bukan per unit. Banyak yang dinyatakan sebagai berat label tertentu yang memiliki rata-rata di bawah berat label yang dimaksud tidak lulus pemeriksaan, bahkan jika variasi antar unit tidak signifikan. Per NIST HB 133, banyak tidak dapat memiliki lebih dari 2.5% unit di bawah MAV.
- Penegakan di bawah NCWM: Program W & M Negara yang berfungsi di bawah sistem Konferensi Nasional tentang W & M melakukan audit makanan kemasan secara teratur. Sistematik yang dipaksakan di bawah pengisian digunakan sebagai pemicu, bahkan jika tidak ada label individu yang dapat ditantang.
Catatan Kepatuhan Penting
NIST 0,9 g MAV per unit 9× lebih longgar dari standar kalibrasi industri ± 0,1 g. Kesenjangan ini ada karena merek kopi mengkalibrasi untuk konsistensi rasa dan integritas merek — tidak hanya kepatuhan terhadap peraturan. Kepatuhan dapat dicapai pada toleransi ± 0,5 g; kualitas cangkir yang konsisten membutuhkan ± 0,1 g. Jangan gunakan MAV sebagai target produksi Anda. Gunakan sebagai lantai di bawah mana risiko penegakan dimulai.
Operator membangun secara penuh lini produksi kapsul kopi harus menyertakan SOP kalibrasi terdokumentasi dalam sistem manajemen mutu mereka dari hari pertama — regulator dan pembeli ritel besar semakin meminta catatan kalibrasi sebagai bagian dari kualifikasi pemasok.
Masa Depan K-Cup Dosing — Smart Calibration, Auto-Adjust, dan Weight-Feedback Systems
Pasar mesin pengisian kapsul kopi diperkirakan akan berkembang pada tingkat pertumbuhan tahunan gabungan 9,1% hingga 2030 karena tuntutan otomatisasi dari pemanggang ukuran menengah yang memompa sejumlah besar polong mempercepat transisi dalam ketepatan dosis dari siklus kalibrasi manual ke loop tertutup sistem kalibrasi mandiri.
Tiga arah teknologi yang mungkin ingin Anda perhatikan, jika peningkatan peralatan adalah sesuatu yang Anda bayangkan:
- Integrasi checkweigher inline. Semua checkweigher inline baru memberikan pengukuran akurasi 1 mg dan sepenuhnya terintegrasi dengan PLC mesin pengisian. Setiap kali berat isi melebihi batas yang ditetapkan, checkweigher alarm cangkir ke sistem pengisian dan dapat secara otomatis menginstruksikan kontrol mesin untuk menyempurnakan Rasio Isi.Untuk garis yang memproduksi> 60 cangkir/menit, laba atas investasi dari integrasi checkweigher biasanya melampaui biaya dalam tahun pertama produksi.
- Kontrol servo umpan balik berat. Sistem auger loop terbuka di mana servo memerlukan jumlah rotasi yang telah ditentukan per akurasi pengisian adalah 97.5%; sistem umpan balik berat di mana setiap output pengisian diukur secara digital, maka setiap rotasi yang akan datang dikoreksi secara real-time memberikan akurasi 99.7%. Perbedaan 2.2% ini sama dengan siklus kalibrasi ulang yang jauh lebih sedikit per shift, dan pengurangan beban kerja pengambilan sampel QC yang dapat diukur.
- Prediksi kalibrasi yang diaktifkan AI. Jalur pengisian kapsul farmasi telah menerapkan pembelajaran mesin untuk memperkirakan waktu kalibrasi berdasarkan pola penyimpangan berat historis — sebelum sampel out-of-spec pertama. Pendekatan ini bermigrasi ke arah aplikasi kapsul makanan dan kemungkinan akan tersedia secara komersial untuk produsen K-cup sekitar periode waktu 2026-2028.
Kriteria Evaluasi Upgrade
Integrasi Checkweigher terbayar ketika: (1) Anda menjalankan> 60 cangkir/menit, (2) Anda menghasilkan beberapa SKU dengan kopi yang berbeda yang memerlukan kalibrasi ulang sering, atau (3) pembeli ritel memerlukan verifikasi berat didokumentasikan untuk kualifikasi pemasok. Di bawah 60 cangkir/menit, protokol QC manual disiplin biasanya cukup. Lihat caranya kehidupan rak kapsul kopi perbaikan melalui pasangan pembilasan nitrogen dengan dosis presisi dalam operasi volume tinggi.
Pertanyaan yang Sering Diajukan
Bagaimana saya tahu apakah dosis mesin pengisian K-cup saya akurat?
Timbang lima cangkir, berturut-turut diisi dan temukan rata-rata. Jika pengukuran rata-rata sesuai dengan spesifikasi kalibrasi (dalam 0,1 g), maka kalibrasi benar. Jika lebih dari dua dari lima sampel memiliki pengukuran lebih besar dari 0,2 g jauhnya dari spesifikasi, maka kalibrasi sebelum memulai produksi berjalan.
Berapa berat isi yang harus saya atur pada mesin pengisian K-cup saya?
Berat isi K-cup standar adalah 10 Мены 12 g kopi bubuk, tergantung pada campuran dan preferensi ekstraksi Anda. Panggang yang lebih ringan cenderung lebih padat, sehingga menghasilkan isian yang lebih berat per giliran auger — Anda mungkin perlu sedikit menyesuaikan target Anda dibandingkan dengan panggang gelap dengan kekuatan ekstraksi yang sama. Mulailah dengan 11 g sebagai dasar, jalankan prosedur kalibrasi Anda, dan sesuaikan berdasarkan pengujian rasa setelah berat produksi terkunci. Rasio 1:16 Вереська отель отенте одено оде оде отов оделя оно остов одено остов ов одено о одено о одена о одено о ов о ов ов оно ов ов ов ов оно остонононононононо ононо онононононо онтентенонтононононо.
Mengapa mesin pengisian K-cup saya menghasilkan bobot yang tidak konsisten setelah berjalan dengan baik selama berminggu-minggu?
Tiga faktor menyebabkan sebagian besar fluktuasi berat pada drop: (1) tingkat pengisian hopper pergi di bawah 60% karena kegagalan dalam sistem kontrol, mengurangi tekanan kepala pada auger dan dengan demikian output per revolusi; (2) kelembaban sekitar lebih tinggi menyebabkan aglomerasi bubuk dan aliran tidak merata; (3) benar-benar mendapat tas baru atau batch kopi yang sama yang berbeda ukuran partikel/kepadatan. Periksa tingkat hopper pertama (ini adalah alasan yang paling umum, tetapi paling diabaikan), kemudian periksa kelembaban lingkungan produksi, kemudian kalibrasi ulang pada batch kopi saat ini.
Seberapa sering saya harus mengkalibrasi ulang mesin pengisian K-cup saya?
Selalu komisi ulang atau re-tune ketika mengubah jenis kopi—ini adalah tindakan yang paling penting dan juga yang paling diabaikan. Untuk menghasilkan profil minuman yang konsisten menggunakan kopi yang sama, menghasilkan cek 5 cangkir di awal setiap minggu dan prosedur kalibrasi lengkap bulanan. Pemicu commissioning lain yang diperlukan: Kesenjangan produksi yang berlangsung lebih dari 7 hari, perubahan kelembaban melebihi 15%, dan layanan mesin pada auger/hopper.
Apakah ukuran grind mempengaruhi kalibrasi mesin pengisian K-cup?
Ya, secara signifikan — dan efeknya tidak proporsional. Penggilingan kasar-sedang dalam kisaran 200 В 1.000 μm mencapai akurasi dosis 99.0 В 09.5%. Di bawah sekitar 100 μm (penggilingan halus), akurasi turun menjadi 97.5% karena bagaimana partikel halus kompak di bawah kompresi auger. Selalu jalankan kalibrasi ulang penuh saat mengubah pengaturan penggilingan, dan tingkatkan frekuensi pengambilan sampel QC Anda saat menjalankan profil penggilingan halus.
Siap Dial Di Lini Produksi Anda?
AFPAK kustom menyesuaikan mengisi berat dan mengisi parameter rasio bersama-sama dengan pemasok K-cup Anda untuk mencocokkan gaya kopi dan kuantitas produksi Anda. Silakan hubungi kami untuk memiliki bantuan dalam kalibrasi peralatan Anda pada mesin atau melihat apakah baris Anda dikonfigurasi tepat untuk beban kerja Anda.
References
- Badan Pengawas Obat dan Makanan AS. 21 CFR Bagian 101.9- Pelabelan Nutrisi Makanan. Kode Elektronik Peraturan Federal. ecfr.gov.
- NIST. Handbook 133: Memeriksa Isi Bersih Barang Kemasan. Edisi 2023. nist.gov.
- Specialty Coffee Association. Standar Kopi — Rasio Pembuatan Bir. sca.kopi.
- AFPAK. Cara Mengatur Parameter Pengisian pada Mesin Pengisian K-Cup. afpakmachine.com/cara-mengatur-mengisi-parameter-pada-k-cup-mengisi-mesin
- Wolf Packing. Auger Filler Accuracy: Mencapai Konsisten Powder Dosing Setiap Saat. serigala-packing.com
- Pembuatan.com. Checkweigher Kapsul Otomatis untuk Kontrol Berat Statistik. membuat.com.
Artikel Terkait